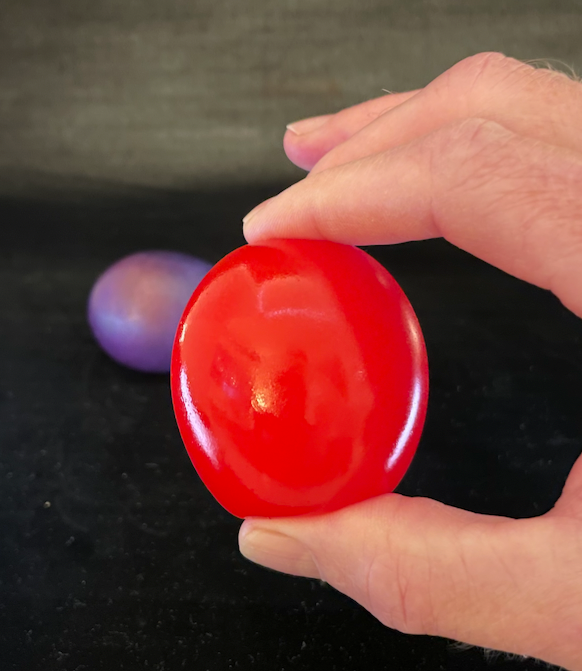
rubber eggs

• Several raw eggs for multiple experiments.
• Glass jars/cups or containers to hold the eggs whilesoaking.
• Vinegar
• Jar
• Vinegar• 12” String
• Food scale (optional)
• Jar
• Corn Syrup
• Mix equal parts vinegar & tonic water (no substitutes,only tonic water)
• Black Light for florescent eggs (optional) Amazon link
• Jar
• Vinegar
• Food coloring (neon works best for brightest colors) Amazon link
instructions for activities:
Let’s Get Started:
Step 1. Carefully place the raw egg(s) into the jar.
Step 2. Completely submerge the egg(s) with vinegar. You may need to weight them down with a spoon or some type of other small weight.
Step 3. Watch and Ask. Why are the eggs are bubbling? A: The vinegar is acetic which starts a chemical reaction to slowly dissolves the the egg shell and releases carbon dioxide gas.
Step 4. Continue to watch for a few days and let the acetic acid dissolve the shell. You’ll know it’s working when you see white foam on the surface. You may need to top it off a few times.
Step 5. Carefully remove the egg(s) from the jar with a spoon, or catch it with your hand. It will feel soft and rubbery.
Step 6. At this point you may be able to rub the shell off the egg with your fingers. You can hold it under a trickle of running water. It will rub off as a white powdery, gritty substance. Be very careful not to break the egg. At this point it will look like you have a clear window into the egg. Remember, it gets more fragile as the shell rubs off.

Step 7. With the shell off, the egg still has a membrane that holds it together. This is called a “naked egg”.
Activity 1 - Expanding Eggs: After Completing “Let’s Get Started” steps.
Step 1 - Measure and/or weigh the shelled egg and then the naked egg. You can put the egg on a food scale, or take a piece of string and measure the diameter of both eggs.
Step 2 - Why is the naked egg bigger than the egg with the shell?
A: It happened by osmosis. The naked is egg is a bit bigger because some of the vinegar (and some of the water in the vinegar) has moved through the membranes to the inside of the egg. The membranes are semi-permeable and allow water to move through them. This is called osmosis.
Activity 2 - Shrinking Eggs (osmosis): After Completing “Let’s Get Started” steps.

Step 1 - In a jar submerge the naked egg in some Corn Syrup.
Step 2 - Wait and watch for a day and you will begin to see your egg begin to shrink and look a little baggy.
Step 3 - Why is the naked egg getting smaller?
A: Corn syrup has very little water content. Once the egg is submerged, the water inside the egg begins to move across the egg membrane to equalize the water concentration. That’s osmosis at work. If you leave your egg in the syrup long enough it will begin to look something like a huge raisin – with, of course, a yoke inside.
Step 4 - Now let’s reverse the osmosis and inflate the egg. This activity only takes a few hours. Place the shrunken egg into a jar of water. The water will move across the membrane and fill the egg with water.
Activity 3 - Ghost Eggs:

Step 1 - With some new raw eggs, repeat “let’s get started” steps, but you need to use equal parts vinegar and tonic water. Remember you need to use real tonic water because it has an ingredient called Quinine (kwai-nine), that’s the fluorescent ingredient.
Step 2 - With the naked egg you can now submerge it in a jar filled with tonic water, then shine the black light on the jar. It will now glow.
Step 3 - Take the naked egg out of the jar and put it under a black light and watch it glow.
Activity 4 - Colored Eggs:

Step 1 - Follow the “Let’s Get Started” steps 1 thru 7. But you will add the food coloring in step 2 of the ““Let’s Get Started”. Neon food coloring link Amazon link
Step 2 - With the bright colored naked egg, you should put it under a flashlight or another bright light and it will glow.
Activity 5 - Suck the Egg into the Bottle: (best if done outside or in a fire safe indoor area)

Step 1 - For this activity you will need the materials listed in the material section for activity 5, including one or more of your already pre-made “naked eggs”. It can be colored or not colored.
Step 2 - Place the milk jar in a flat, fire safe area.
Step 3 - Set up the camera on a tripod and set it in slow motion video mode.
Step 4 - Gather your matches or lighter and thick paper strip.
Step 5 - When you have everything ready start filming.
Step 6 - Light the paper strip and carefully but quickly drop it into the glass bottle.
Step 7 - Immediately after you put the paper in the bottle, place the naked egg on top of the bottle.
Step 8 - Watch the naked egg be pulled into the bottle. Then rewatch the slow motion video. It’s pretty cool to see in slow motion.
grandpa’s thoughts:
This activity is so fun because it has so many variables and options. Your grandkids will love it because they will learn many science lessons and a little patience waiting of the egg shell to dissolve.
It’s fun to do around Halloween because of the colors and black light activities. Have fun grandpa-bonding with your grandkids with Rubber Eggs.